概要
想低成本的搞一个博客,在网上找了很多参考资料,于是尝试 Hexo+Github Pages 折腾一下。我把自己的搭建过程记录下来,把其中遇到的一些问题也跟大家分享。
安装过程
前提
我用的是 macOS 系统;
node、npm、git 等的安装,还有 github 的配置就不多讲了;
基于 hexo 的 3.7.0 版本。
安装 hexo 客户端
1 | npm install -g hexo-cli |
创建一个用来放 hexo 的文件夹
(假设为 hexo)cd 进去,创建 hexo 站点
1 | hexo init |
使用 next 主题
为了博客的美观和使用上方面,我使用的大众的 next 主题。cd themes 目录。
下载 next 主题
1 | git clone https://github.com/iissnan/hexo-theme-next |
修改 theme
编辑 hexo/_config.yml,找到 theme 那一行配置,修改为 next
本地启动看看
安装完之后,我们可以在本地启动看看博客初始化的效果。
生成静态文件
1 | hexo g |
hexo 最终运行的是静态文件,包括js,css和html等,这些文件统一放在 public 文件夹。
安装 hexo-server
1 | npm install hexo-server --save |
启动 server
1 | hexo s |
在浏览器打开 localhost:4000,会看到一个 Hello World的页面。恭喜你,部署成功。
部署到 github
把 hexo 生成的静态文件上传到 github,别人就可以在 github 的网站上看到你的博客了。
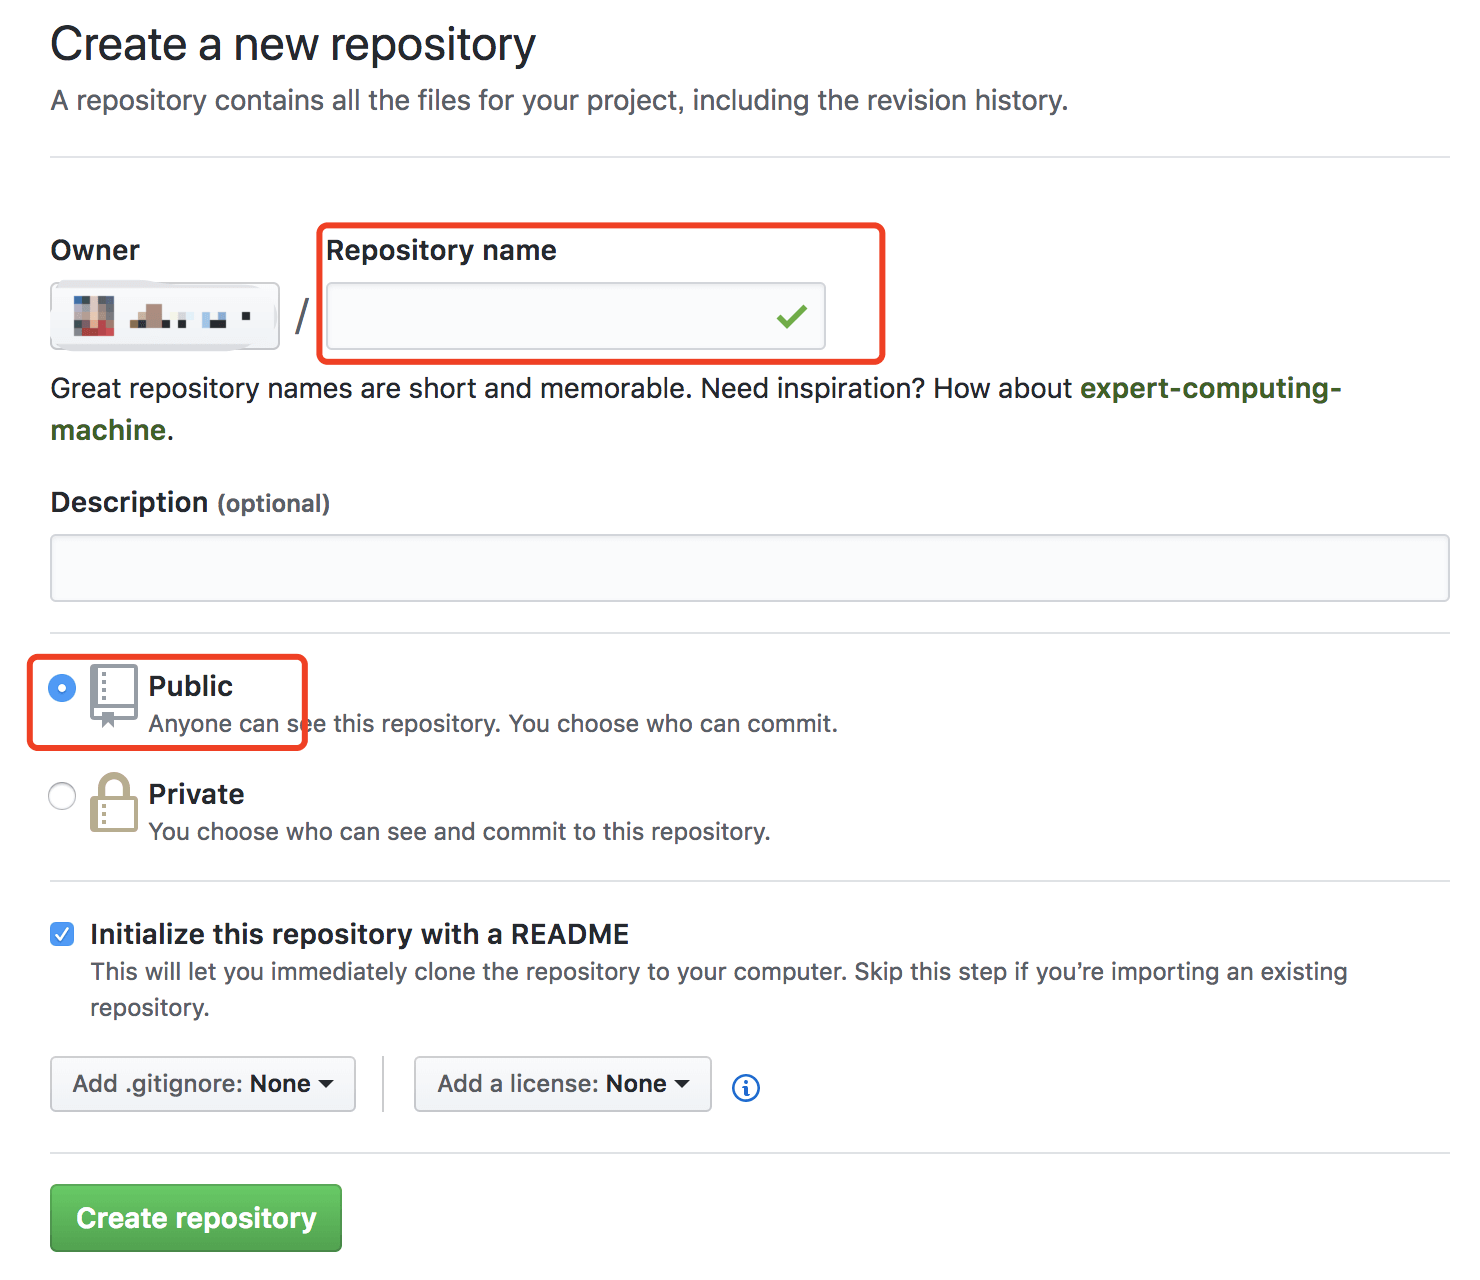
创建 repo
在 github 上创建一个仓库,repo的名字为 username.github.io
安装 deploy 插件
cd 到 hexo 目录,执行
1 | npm install hexo-deployer-git --save |
修改 deploy 相关配置
编辑 hexo/_config.yml,修改 deploy 下几个属性
1 | type: git |
push 到 github
1 | hexo d |
就会自动把 public 文件夹下所有内容 push 到 master。注意这里看一下 git config user.name\email 是否正确。
打开网页
打开 username.github.io 就可以看到了
添加“分类”,“关于”和“标签”菜单
到此已经把博客基本的安装和部署好了。但是我们还需要做一些基本配置,让我们可以维护博客。
打开 tags,about,categories
在主题配置文件 next/_config.yml 在 menu 下去掉 tags,about,categories 注释。
注意这里“主题配置文件”指的是 themes/next 目录的下的 _config.yml。
创建 tags,about,categories
在 hexo 文件夹
1 | hexo new page tags |
会在 source 文件夹生成 tags 文件夹,编辑里面的 index.md ,添加
1 | type: "tags" |
同样的方法添加 categories;
添加 about 不需要修改 md 文件的 type,因为 tags,categories 是特殊目录类型,about 只是简单的一个 md。
为文章添加标签和分类
在文章 md 文件开头 title 的下面,增加类似,就可以归类到 tag 和 category
1 | tag: |
添加头像图片
在 hexo/_config.yml 找到配置 avatar,增加图片路径
1 | avatar: /images/avatar.jpeg |
新建文章
1 | hexo new post new1 |
就会在 source/_post 文件夹下生成 new1.md 文件,编辑 md 文件即可。
这里为什么是 post ?
这里涉及 hexo 的模版行为,在 scaffolds 目录下初始定义了3个模板,draft、page、post,文章就是用到了 post。
代码管理
首先要搞清楚,hexo d 会把 public 文件夹 push 到 username.github.io 这个 repo 的 master 分支。但是这些文件都是一些生成出来的html,css,js 等,对我们没用,所以我们需要把原始文件如 md,images,_config.yml 等文件也需要保存下来,说白了就是把上述的文件也上传到 github,但是我们已经把 public push 到 master了,这时我们可以在 github 上再建一个 repo 来放我们的代码,我的选择是在 username.github.io 上建一个分支放,其实操作是差不多的。
其实,我们可以发现在 hexo 文件夹下有一个 .gitignore 文件,这时 hexo 帮我们准备好的,里面的内容:
1 | .DS_Store |
可以看出 hexo 已经为我们想好了,public、node_modules、.deploy_git 等非源码文件都忽略了。具体自己看情况,这个 .gitignore 我没动。
有个坑
下载下来的是一个 git 库,如果你等下把整个 next 文件夹 push 的话,那么在 github 上 next 文件夹是灰色的,你是操作不了,这可能跟 github 权限有关。所以你要先把 next 下的 .git 文件夹删掉。
在 hexo 文件夹执行
1 | git init |
好了,以后改完文章或者修改完主题配置,就可以 push 到 github 了。
参考资料
https://blog.csdn.net/u012195214/article/details/79204088
http://www.wuxubj.cn/2016/08/Hexo-nexT-build-personal-blog/#
https://zhiho.github.io/2015/09/29/hexo-next/
http://theme-next.iissnan.com/getting-started.html
http://www.lzblog.cn/2016/04/07/Hexo%E7%AB%99%E7%82%B9%E3%80%81NexT%E4%B8%BB%E9%A2%98%E4%BF%AE%E6%94%B9%E5%85%A8%E8%AE%B0%E5%BD%95/
https://codezjx.com/2017/07/31/hexo-guide/